
Welcome to the Honeywell T3 Installation Manual, your comprehensive guide for safely and effectively installing the T3 thermostat. This manual ensures compatibility, proper setup, and optimal performance, addressing key installation steps and safety precautions to guarantee a seamless experience for homeowners and professionals alike.
Overview of the Honeywell T3 Thermostat
The Honeywell T3 Thermostat is a programmable, smart-enabled device designed to regulate home temperatures efficiently. It offers a user-friendly interface, compatibility with various HVAC systems, and advanced features like optimization and geofencing. The T3 is ideal for residential use, providing precise temperature control and energy-saving capabilities. Its compact design and wireless communication options make it a versatile solution for modern heating systems. The thermostat supports both manual and automatic modes, allowing users to customize their comfort settings. With its robust construction and intuitive functionality, the T3 is a reliable choice for homeowners seeking to enhance their heating system’s performance and efficiency.
- Programmable scheduling for tailored temperature control.
- Compatibility with a wide range of HVAC systems.
- Advanced optimization features for energy efficiency.
- Wireless communication for smart operation.
- User-friendly design with manual and automatic modes.
Ensuring reliability and ease of use, the Honeywell T3 Thermostat is a smart solution for modern home heating needs.
Importance of Proper Installation
Proper installation of the Honeywell T3 Thermostat is essential to ensure safe and efficient operation. Incorrect installation can lead to faulty temperature control, system damage, or even safety hazards. Following the installation manual carefully guarantees optimal performance, energy efficiency, and reliability. It also prevents potential issues like incorrect wiring, which could void the warranty or cause electrical problems. Proper installation ensures the thermostat functions as intended, providing accurate temperature readings and responsive controls. Additionally, it safeguards against risks such as overheating or malfunctioning HVAC systems. Always prioritize correct installation steps to maintain safety, efficiency, and longevity of the device. If unsure, consult a qualified professional for assistance.
- Ensures safe and efficient operation.
- Prevents system damage or electrical hazards.
- Guarantees optimal performance and energy efficiency.
- Protects warranty and system longevity.
Correct installation is vital for a reliable and safe user experience.
Pre-Installation Checklist
Before proceeding with the Honeywell T3 Thermostat installation, ensure the following steps are completed to guarantee a smooth and safe process. First, turn off the mains power supply to the HVAC system to avoid any electrical risks. Verify that the T3 thermostat is compatible with your existing heating and cooling system. Gather all necessary tools and materials, including wires, screws, and the optional cover plate. Inspect the wiring to ensure it is undamaged and properly labeled. Familiarize yourself with the terminal designations on both the old thermostat and the T3 model. If upgrading, remove the old thermostat carefully to avoid damaging the wiring. Finally, ensure the installation area is clean and clear of obstructions. Proper preparation ensures a successful installation.
- Turn off mains power to the HVAC system.
- Confirm system compatibility.
- Gather necessary tools and materials.
- Inspect and label wiring.
- Prepare the installation area.
Completing these steps ensures a safe and efficient installation process.
System Requirements and Compatibility
The Honeywell T3 Thermostat is compatible with most HVAC systems, including gas, oil, electric, and heat pump configurations. It supports 24V AC systems and battery-powered setups. The T3 Pro requires a C terminal for AC power. Ensure compatibility with your specific system before installation.
- Compatible with gas, oil, electric, and heat pump systems.
- Supports 24V AC and battery-powered setups.
- T3 Pro requires a C terminal for AC power.
Verify system compatibility to ensure proper functionality.
Compatibility with HVAC Systems
The Honeywell T3 Thermostat is designed to work seamlessly with a wide range of HVAC systems, ensuring flexibility for various home setups. It is compatible with gas, oil, electric, and heat pump systems, making it a versatile option for different heating and cooling configurations. The T3 Pro model specifically supports 24V AC systems and is suitable for central heating and heat pump installations. Additionally, it can be paired with zone valves for zoned heating systems. For optimal performance, ensure your HVAC system meets the voltage and wiring requirements outlined in the manual. Always verify compatibility before proceeding with installation to avoid potential issues.
- Compatible with gas, oil, electric, and heat pump systems.
- Supports 24V AC systems and zoned heating setups.
- Requires proper wiring and voltage alignment for operation.
Verify system specifications to ensure smooth integration.
Power Requirements for the T3 Thermostat
The Honeywell T3 Thermostat operates on a 24V AC power supply, which is standard for most HVAC systems. It is essential to ensure that the system’s voltage matches this requirement to avoid damage or malfunction. The thermostat is designed to be hardwired, requiring a consistent power source for proper functionality. If batteries are used as a backup, the optional C terminal connection is recommended to maintain continuous operation. Always verify the power specifications before installation to ensure compatibility and safety.
- Requires a 24V AC power supply for operation.
- Hardwiring is necessary for consistent power delivery.
- Optional C terminal can support battery backup.
- Ensure system voltage aligns with thermostat requirements.
Proper power setup guarantees reliable performance and safety.
Wireless Communication Specifications
The Honeywell T3 Thermostat supports wireless communication, operating on a 2.4 GHz frequency band for reliable connectivity. It communicates with the Receiver Box, which is wired to the boiler, ensuring seamless control of your heating system. The thermostat’s wireless range is typically up to 30 meters indoors, depending on building layout and potential interference sources. To maintain a stable connection, ensure the thermostat and receiver are positioned optimally. If wireless communication is lost, refer to the troubleshooting section for resolution steps. Proper installation and configuration are essential for uninterrupted operation. Always consult the manual for detailed pairing and setup instructions to ensure optimal performance and connectivity.
Key points:
- Operates on 2.4 GHz wireless frequency.
- Communicates with the Receiver Box connected to the boiler.
- Indoor range of up to 30 meters.
- Avoid physical obstructions for optimal signal strength.

Pre-Installation Steps
Before installing the Honeywell T3 Thermostat, ensure the mains power is switched off for safety. Verify system compatibility and prepare all necessary wiring connections to proceed smoothly.
Turning Off the Mains Power
Before starting the installation, ensure the mains power supply to your HVAC system is completely switched off. This crucial step prevents electrical shocks or injuries. Locate the main electrical panel or breaker box and toggle the relevant switch or remove the appropriate fuse. Verify that the system is powered down using a voltage tester if necessary. Once confirmed, you can safely access and modify the wiring without risk of live electricity. Always follow this precaution to protect yourself and ensure compliance with safety standards during the Honeywell T3 installation process.
Preparing the Wiring for Installation
Before installing the Honeywell T3 thermostat, carefully examine the existing wiring to ensure it matches the terminal designations in the manual. Remove any debris or obstructions and label the wires to avoid confusion. Insert the R and C wires into their designated terminals for primary AC power. Note that the C terminal is optional if batteries are installed but is recommended for reliable operation. To remove wires safely, pull them gently from the terminal connections rather than tugging on the cables. Double-check the wiring configuration against the manual to confirm compatibility and correct connections before proceeding. Proper preparation ensures a smooth installation process and optimal thermostat performance.
Understanding the Terminal Designations
Understanding the terminal designations is crucial for a successful installation of the Honeywell T3 thermostat. The terminals are labeled according to their functions, such as R (24V AC power), C (common), and optional connections for heating, cooling, or fan controls. Ensure the wires from your HVAC system match these designations precisely. The C terminal, while optional when using batteries, is recommended for a stable power supply. Miswiring can lead to system malfunctions or damage. Always cross-reference the wiring with the diagram provided in the manual. If unsure, consult a licensed professional to avoid errors. Proper terminal connections are the foundation of reliable thermostat operation.

Installation Process
The Honeywell T3 installation involves mounting the thermostat, connecting wires to designated terminals, and optionally installing a cover plate. Ensure mains power is off for safety.
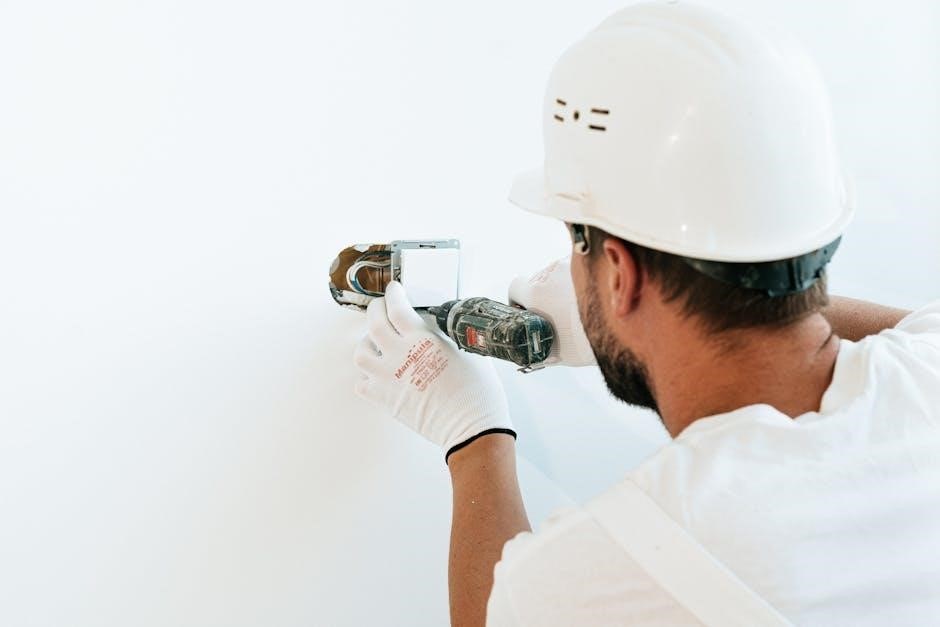
Mounting the Thermostat on the Wall
To mount the Honeywell T3 thermostat, locate the wall where the device will be installed, ensuring it is level and accessible. Use the provided wall anchors or screws to secure the mounting bracket to the wall. If your thermostat includes an optional cover plate, it should be installed after the main unit is mounted. Ensure the wall surface is clean and dry to prevent any damage or instability. Once the bracket is in place, gently attach the thermostat to the bracket, aligning it properly. Double-check that the thermostat is securely fastened and level before proceeding with wiring connections. Proper wall mounting ensures accurate temperature sensing and reliable operation.
Connecting the Wires to the Thermostat
Connecting the wires to the Honeywell T3 thermostat requires careful attention to ensure proper functionality. Start by turning off the mains power to avoid any electrical hazards. Next, prepare the wiring by labeling each wire according to its terminal designation (e.g., R, W, Y, G, C). Match these wires to the corresponding terminals on the T3 thermostat, ensuring each connection is secure. If your system includes a common (C) wire, it is essential for powering the thermostat. Once all wires are connected, restore the power and test the thermostat to ensure it operates correctly. Proper wiring ensures accurate temperature control and reliable performance. Always refer to the manual or a wiring diagram if unsure about any connections.
Installing the Optional Cover Plate
Installing the optional cover plate on the Honeywell T3 thermostat is a straightforward process that enhances the device’s appearance and protects it from dust or tampering. Begin by ensuring the thermostat is already mounted on the wall and all wires are securely connected. Align the cover plate with the thermostat’s base, ensuring it fits snugly over the unit. Gently press the cover plate into place until it clicks securely. If your cover plate requires screws, use the provided screws to fasten it. Once installed, the cover plate will not interfere with the thermostat’s functionality. For a polished look, remove any protective film from the cover plate after installation. Refer to the manual for specific instructions if additional steps are required.
Connecting the Thermostat to the Boiler
Connecting the Honeywell T3 thermostat to your boiler involves ensuring proper communication between the thermostat and the heating system. For models like the T3R, the thermostat communicates wirelessly with a receiver box, which is then wired to the boiler. Ensure the receiver box is correctly installed and connected to the boiler’s control circuit. Insert the R and C wires into the designated terminals for primary AC power. The C terminal is optional if using batteries but recommended for reliable operation. Once connected, the thermostat will control the boiler based on the set temperature and mode. Always follow safety guidelines and verify connections to avoid errors. This setup ensures seamless communication and efficient heating control. Proper installation guarantees optimal performance and safety.

Configuration and Setup
After installation, configure the Honeywell T3 by enabling optimization, setting schedules, and switching between AUTO and MANUAL modes for tailored heating control, ensuring efficient operation and comfort.
Initial Setup and First-Time Use
After installation, power on the Honeywell T3 thermostat and ensure the display lights up. Familiarize yourself with the interface, including buttons and menu options. Press and hold the middle button to access the menu. Enter the default PIN (1234) to unlock advanced settings. Navigate through options to set your preferred language, time format, and temperature units. Check for any firmware updates to ensure optimal performance. Test the thermostat by adjusting the temperature to confirm it communicates effectively with your HVAC system. Review the optimization settings to enable energy-saving features. Finally, set your initial schedule or switch to MANUAL mode for immediate control. This initial setup ensures smooth operation and personalized comfort.
Setting Up the Thermostat’s Schedule
To create a daily schedule, navigate to the menu and select Schedule Settings. Choose between predefined templates or customize your own. Set temperature preferences for morning, daytime, evening, and night. Use the up/down arrows to adjust temperatures and times. Save your schedule to ensure it runs automatically. For flexibility, enable Geofencing or Optimization to adapt based on your location or energy-saving goals. Test your schedule by simulating a full day to confirm smooth transitions. This feature helps maintain comfort while optimizing energy usage, ensuring your home is always at the right temperature when needed. Regularly review and update your schedule to match lifestyle changes.
Enabling Optimization Features
Optimization features on the Honeywell T3 enhance energy efficiency without compromising comfort. To enable them, go to the Settings menu and select Optimization. Choose from options like Smart Recovery or Geofencing. Smart Recovery learns your system’s performance to preheat or cool, ensuring the set temperature is reached just in time. Geofencing uses your location to adjust temperatures when you leave or arrive home. Enable these features during initial setup or anytime through the menu. Optimization can be activated via the installer settings, ensuring energy savings and tailored comfort. Regularly review and adjust these settings to optimize performance and energy usage.
Switching Between AUTO and MANUAL Modes
To switch between AUTO and MANUAL modes on the Honeywell T3, press the middle button. In AUTO mode, the thermostat follows a preset schedule, automatically adjusting temperatures based on your programmed settings. This mode is ideal for maintaining energy efficiency and consistent comfort. In MANUAL mode, the thermostat operates continuously at a set temperature, giving you direct control. When in MANUAL mode, “MAN” will appear on the display. Use the arrows to adjust the target temperature. Switching modes is simple, allowing you to customize your heating or cooling preferences as needed. This flexibility ensures the T3 adapts to your lifestyle, whether you prefer automated schedules or manual overrides.
Advanced Features and Settings
Explore advanced features like Optimization Active Mode, Geofencing, and Manual Override Functions. These settings enhance efficiency, location-based control, and customization for tailored comfort and energy savings.
Understanding Optimization Active Mode
Optimization Active Mode is an advanced feature designed to enhance heating system efficiency by learning and adapting to your home’s thermal characteristics. This mode ensures consistent comfort while minimizing energy consumption. It activates automatically when enabled in the installer settings, displaying a status on the thermostat during operation. By analyzing temperature trends and adjusting the heating schedule, Optimization Active Mode optimizes performance without compromising comfort. Users can enable or disable this feature based on preference, with detailed instructions provided in the installation guide. This intelligent function is ideal for those seeking energy savings and improved system responsiveness, making it a key feature of the Honeywell T3 thermostat.
Configuring Geofencing for Smart Operation
Geofencing allows the Honeywell T3 thermostat to adjust temperature settings based on your location, enhancing energy efficiency and convenience. To configure this feature, enable location services on your smartphone and link your device to the thermostat via the Honeywell Home app. Set a geofence radius around your home, and the thermostat will automatically switch to eco-mode when you leave the area and resume normal operation upon your return. This smart operation ensures your home is always comfortable without wasting energy. Detailed steps for setup can be found in the installation manual, ensuring seamless integration of geofencing into your daily routine.
Binding and Manual Override Functions
The Honeywell T3 thermostat offers binding and manual override functions to customize its operation. Binding links the thermostat to its receiver box, ensuring communication with the boiler. To bind, press and hold the left and right buttons for 5 seconds. The manual override allows temporary adjustments to the set temperature without altering the scheduled settings. This feature is useful for immediate comfort changes. To activate, press the middle button to switch to MANUAL mode, where “MAN” will appear on the display. Adjust the temperature using the arrows. Note that manual overrides are temporary and will revert after a restart or timer expiration. These functions provide flexibility while maintaining energy efficiency and scheduled operations.
Troubleshooting Common Issues
Troubleshooting the Honeywell T3 thermostat involves addressing wireless communication loss, incorrect temperature readings, and installation errors. Ensure proper wiring, check power connections, and verify system compatibility for optimal performance.
Resolving Wireless Communication Loss
Wireless communication loss in the Honeywell T3 thermostat can occur due to signal interference or misconfiguration. To resolve this, restart the thermostat and receiver box, ensuring they are within range and not obstructed by walls or devices. Check that both devices are powered on and properly paired. If issues persist, refer to the pairing instructions in the manual or reset the thermostat to factory settings. Ensure all firmware is updated, and verify that no physical obstructions are blocking the signal path. Contact customer support if the problem continues after these steps.
Fixing Incorrect Temperature Readings
Incorrect temperature readings on the Honeywell T3 thermostat can occur due to sensor calibration issues or wiring problems. To resolve this, first, ensure the thermostat is installed away from direct sunlight, drafts, or extreme temperatures. Next, check the wiring connections for damage or loose terminals and verify that the correct wires are connected to the appropriate terminals. Reset the thermostat by turning it off, waiting 30 seconds, and then turning it back on. If the issue persists, recalibrate the temperature sensor through the thermostat’s menu settings. Ensure the firmware is up to date, as outdated software may cause accuracy issues. If problems continue, consult the user manual or contact Honeywell support for further assistance.
Addressing Installation Errors
Installation errors with the Honeywell T3 thermostat can often be resolved by reviewing the wiring connections and ensuring all terminals are correctly matched. Common issues include reversed R and C wires or loose connections, which can prevent proper functionality. Verify that the thermostat is mounted level on the wall and that all screws are securely tightened. If the display is unresponsive, check that the mains power is turned on and that no circuit breakers have tripped. Ensure the boiler and system are compatible with the T3 model. Consult the installation manual for specific wiring diagrams and troubleshooting steps. If issues persist, perform a factory reset or contact Honeywell support for further assistance.
Maintenance and Safety
Regularly clean the thermostat’s display and sensors to ensure accurate temperature readings. Always switch off mains power before performing any maintenance or repairs to avoid electrical hazards. Schedule annual professional checks to maintain optimal performance and safety. Ensure all installations and adjustments comply with local regulations and safety standards. Keep the user manual handy for quick reference during maintenance tasks. Proper upkeep extends the lifespan of your Honeywell T3 thermostat and ensures reliable operation year-round.
Regular Maintenance Tips for the T3 Thermostat
Regular maintenance ensures optimal performance and longevity of the Honeywell T3 thermostat. Clean the display and sensors periodically to maintain accuracy. Check and replace batteries (if applicable) every 12 months or as indicated by low-battery alerts. Inspect wiring connections for damage or corrosion and ensure they are secure. Schedule annual professional checks to verify system compatibility and performance. Update software when prompted to access new features and improvements. Refer to the user manual for specific maintenance instructions tailored to your model. By following these tips, you can ensure your Honeywell T3 thermostat operates efficiently and reliably, providing consistent comfort and energy savings.

Safety Precautions During Installation
Ensuring safety is critical when installing the Honeywell T3 thermostat. Always switch off the mains power supply before starting the installation to avoid electrical hazards. Verify that the system is completely powered down and cool to the touch. Use appropriate tools and avoid touching live wires or terminals. Wear protective gear such as gloves and safety glasses if necessary. Follow all local electrical regulations and guidelines. If unsure about any step, consult a qualified professional. Never attempt to bypass safety features or ignore warnings provided in the manual. Proper adherence to these precautions ensures a safe and successful installation process for the Honeywell T3 thermostat.
Ensuring Compliance with Local Regulations
Compliance with local regulations is essential when installing the Honeywell T3 thermostat. Always adhere to national and regional electrical codes, as well as safety standards, to ensure legal and safe operation. Installation must be performed by a competent person, as specified in the manual, to avoid potential hazards. Familiarize yourself with local building codes and regulations regarding thermostat installations. Use approved materials and methods to meet these requirements. Additionally, verify that the thermostat complies with local energy efficiency standards and environmental regulations. For installations in Europe, ensure the device bears the CE marking, indicating compliance with EU directives. Refer to the manual and consult local authorities if unsure about specific requirements to guarantee full compliance and safety.
The Honeywell T3 installation is now complete. Ensure all connections are secure and test the thermostat. Refer to the manual or Honeywell support for any further assistance.
Final Checks After Installation
After completing the installation, ensure the thermostat is powered on and functioning correctly. Verify that all wires are securely connected to the correct terminals. Check the wall mount for stability and proper alignment. Test the thermostat’s basic operations, such as switching between modes and adjusting temperatures. Ensure the display is clear and responsive. Review the schedule settings and optimization features to confirm they are configured as desired. Finally, consult the user guide to verify that no steps were missed and that all safety precautions have been followed. This ensures optimal performance and safety for your Honeywell T3 thermostat.
Resources for Further Assistance
For additional support, visit the official Honeywell website to access the complete T3 installation manual, user guides, and troubleshooting resources. The Honeywell Home website offers detailed documentation, FAQs, and video tutorials to assist with any installation or operational queries. You can also contact Honeywell’s customer support team directly via phone, email, or live chat for personalized assistance. Furthermore, online forums and community discussions provide valuable insights and solutions from experienced users. Ensure to refer to these resources if you encounter any issues or need clarification on specific features or settings. These resources are designed to help you maximize the functionality and efficiency of your Honeywell T3 thermostat.